The world of tube manufacturing is undergoing a deep transformation, and at its core is the pursuit of precision and efficiency. Innovative inspection systems are playing a pivotal role in this revolution, enabling manufacturers to embrace the future of welding technology.
In this blog, we'll explore the evolution of High-Frequency Induction (HF) welding and how technology is shaping its future.
The Challenge of High-Frequency Induction (HF) Welding
HF welding is renowned for its speed and versatility, making it a favored choice for manufacturers dealing with various tube diameters and thicknesses. However, it presents manufacturers with complex challenges. Precise control over mill geometry, material quality, and welder settings is essential. As the demand for high-strength materials and cost-effective production rises, manufacturers need a solution to conquer these challenges.
The Power of Innovative Inspection Systems
At the heart of this transformation is the integration of advanced inspection systems, designed to tackle the intricacies of HF welding while maximizing precision and efficiency.
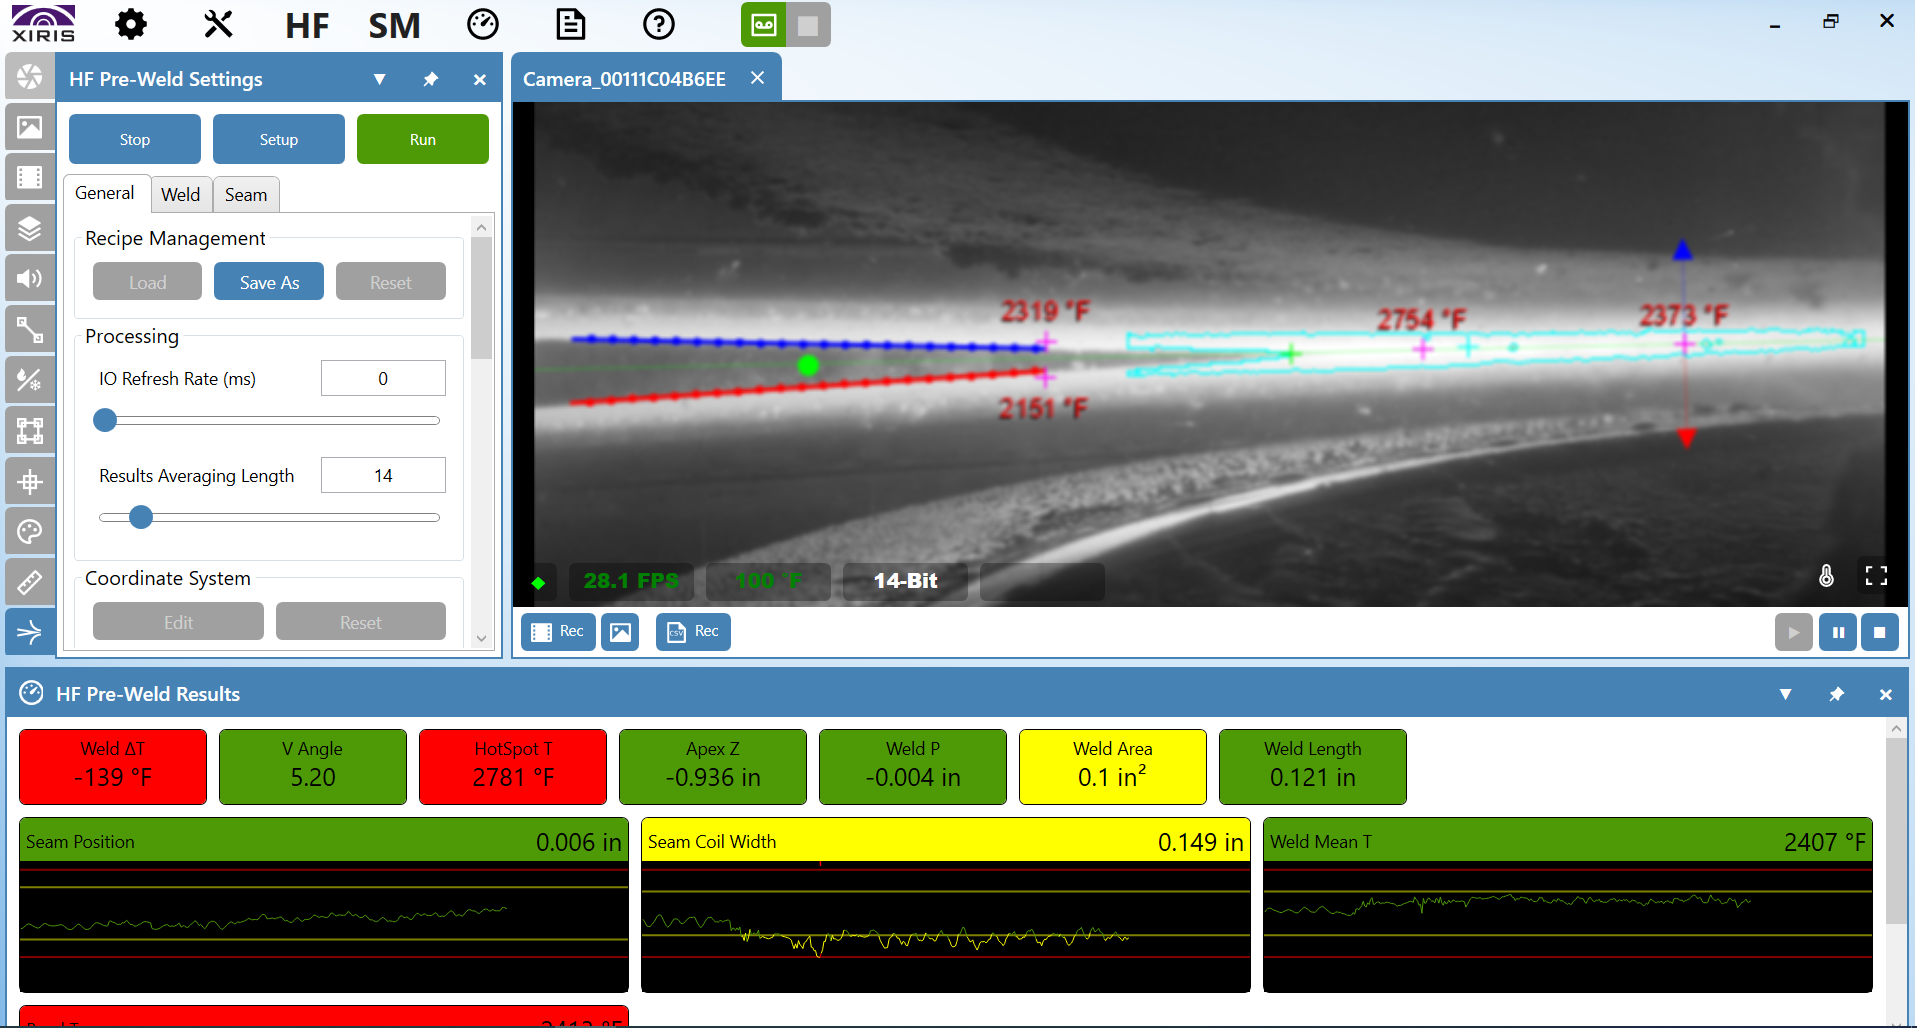
- Unprecedented Clarity: Advanced weld cameras offer a detailed 2D view of the Weld "V" post-induction coil, providing operators with invaluable insights into the welding process.
- Data-Rich Analysis: These systems decode both geometric and thermal data, empowering manufacturers to achieve precise control over every aspect of the welding process.
- Real-Time: Continuous measurement and real-time monitoring enable operators to fine-tune the welding process as it unfolds, responding to changes swiftly.
- Data-Driven Decision-Making: Statistical Process Control (SPC) analysis tools ensure data-driven excellence, setting the industry's new standard for quality.
|
 A Screenshot of the Process Screen Taken from the System Computer (source: Xiris) A Screenshot of the Process Screen Taken from the System Computer (source: Xiris) |
How to Measure V-Angle in HF Welding
A critical question in HF welding revolves around measuring the V-angle. This parameter plays a pivotal role in determining the welding process's efficiency and reliability. Innovative inspection systems provide a clear answer to this query, offering real-time measurements and insights that guide operators to achieve the optimal V-angle.
With these advanced inspection systems in place, the industry has witnessed a remarkable transformation:
- Seamless Welds: Flawless welds and unwavering quality have become the industry's new norm, raising the bar for quality standards.
- Cost-Efficiency: Enhanced productivity and cost-efficiency have become the industry's new norm, allowing manufacturers to meet market demands effectively.
- Real-Time Control: Operators now have the ability to fine-tune the welding process in real-time, responding to changes swiftly.
- Data-Driven Excellence: Informed decisions based on data have become the cornerstone of operations, ensuring optimal results.
- Early Deviation Detection: The industry now boasts early detection of deviations, allowing for immediate corrective actions and maintaining consistent quality.
The integration of innovative inspection systems has ushered in a new era of precision and efficiency in tube manufacturing. The industry is no longer bound by the limitations of the past, and the future looks incredibly promising.
Download our exclusive whitepaper, delving deeper into mastering HF welding challenges and achieving precision in tube manufacturing. Learn all about the “V”, measuring the seam gap, the “V” length, weld length, locating the apex, measuring temperature of other features, and how to use the gathered data.
Stay up to date by following us on social media or subscribe to our blog!


.png)
