In this edition of "Stories from the field," we present a fascinating case study of one of our esteemed customers.
Delve into API pipe production, exploring weld intricacies and temperature dynamics in HF tube mills. Analyze temperature disparities before welding, uncovering insights into heating and thickness consistency. Utilize cutting-edge technology at welding junctures to detect abnormalities and establish benchmarks for excellence. With a specialized camera providing real-time insights, enhance your understanding and confidence in welding.
Embark on this field story to witness how this solution reshapes our outlook on welding.
Industry: Tube and Pipe
Equipment Used: HF Pre-Weld Inspection System
Weld Type: High Frequency
Camera Type and Mounting: HFPW
Description:
An API pipe producer was interested in measuring the geometry of the weld V at the point of welding on an HF tube mill, but also interested in measuring temperature of a number of key features of the process, namely:
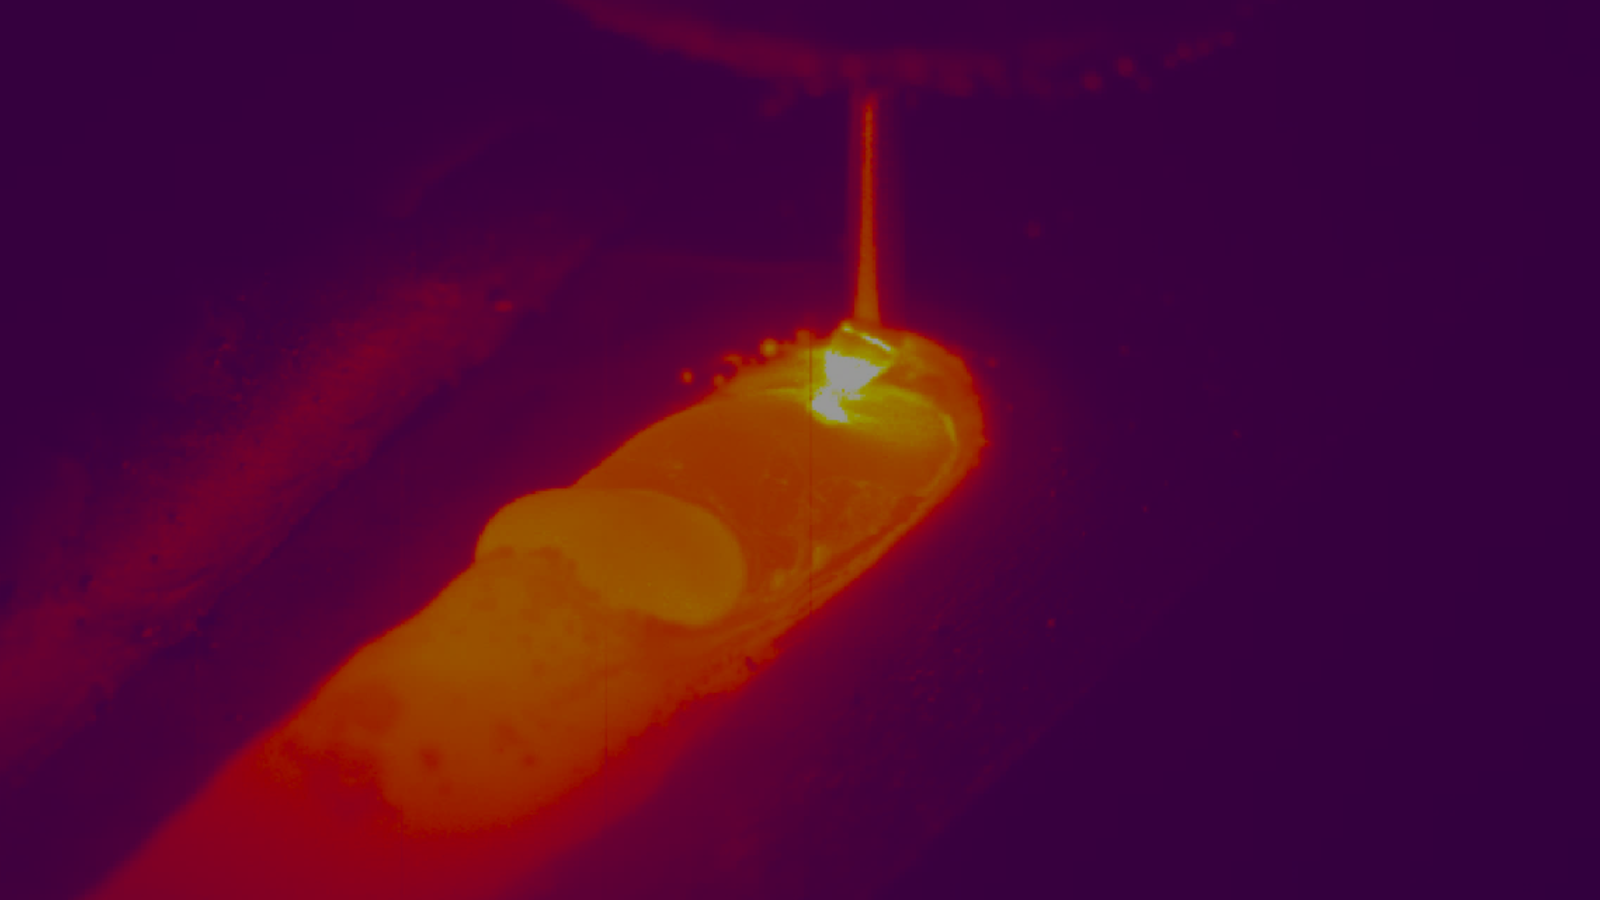
- Temperature difference between either strip edge prior to the weld point. The pipe producer felt this was important to indicate if the both sides of the strip were evenly heated prior to being squeezed together.
The induction coil position, as well as the impeder condition, or its set up, may influence energy concentrations on one strip edge differently from the other.
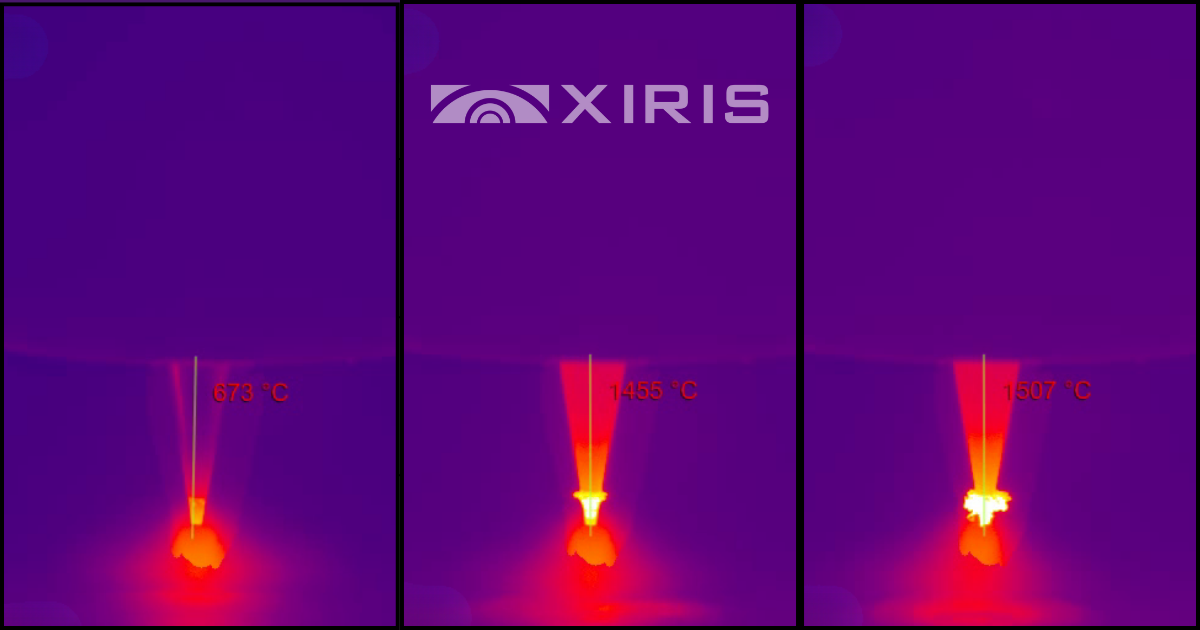
Alternatively, temperature differences could indicate thickness variations between either side of the strip. - Measuring the temperature response of the weld process at a couple of key points: right at the weld apex and a fixed spot on the completed weld bead.
Apex is found by looking for the hottest point on the weld bead using the local temperature maximum.
An additional fixed measurement spot at or after the weld roll centerline gives us the final bead temperature. Using both points together can potentially indicate heat penetration rates.
Through the use of sw tools, the operator is able to set process limits and set working range limits that could establish best practices. The goal would be to give the operator measurable process feedback with alarms so that the operator has a early indicator to process anomalies.
Customer Success:
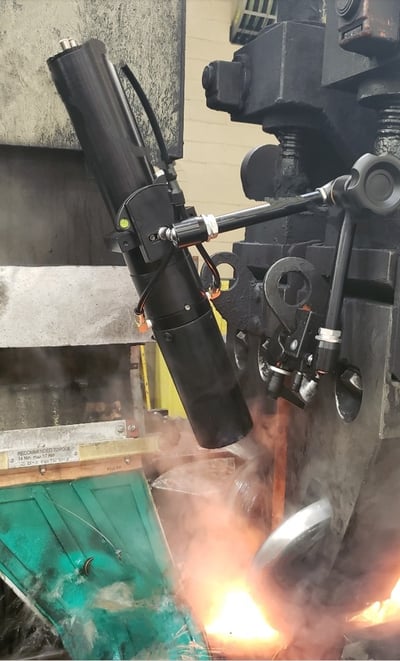
A Xiris SWIR thermal camera that was calibrated to 1800°C was placed at the HF weld environment to look at the weld “V” immediately after the induction coil providing real time temperature data of the weld process. Once temperature working parameters were established, the operator was able to set alarms that would notify production staff if process anomalies occur.
What were the outcomes or benefits achieved?
Real time temperature measurement that enables better understanding of the weld process.
Temperature data of the process inspired more confidence in the welding process by the fabricator
To learn more about how you can implement Xiris inspection systems, reach out to our product experts.
Stay up to date by following us on social media or subscribe to our blog!


.png)
