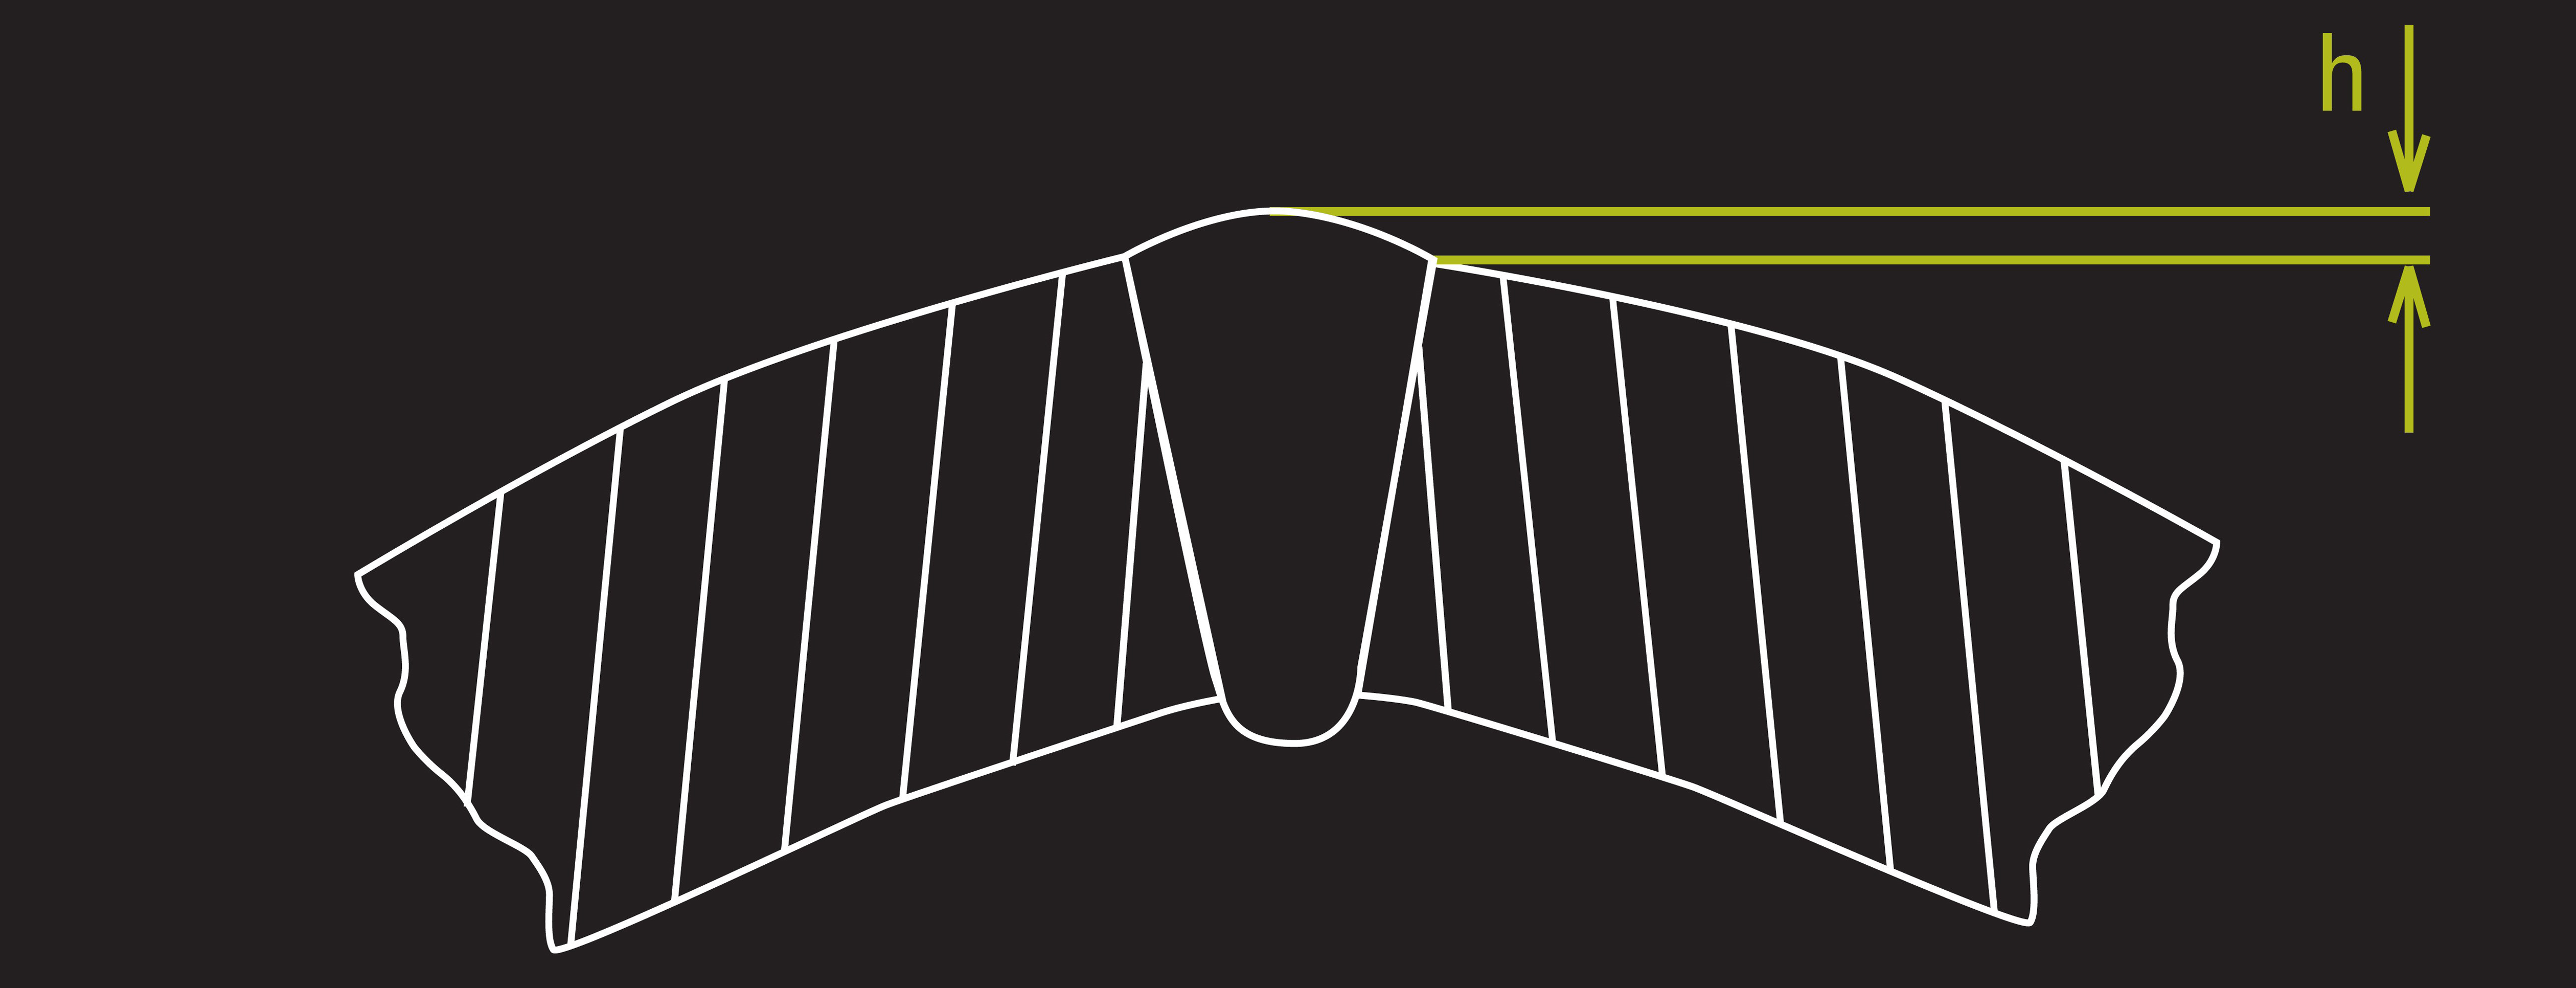
Lighter wall mild steel pipe production requires bead height monitoring for bead ripple. Bead ripple is a condition sometimes associated with a weld process that is too hot and may result in longitudinal weld cracks. Bead ripples appear along the length of the weld bead as undulations with measurable differences in height by as much as 1/8” (3 mm). Often the height of the bead ripple on a welded pipe is a function of the heat that has gone into the weld process: the higher the heat, the greater the height of the bead ripple. In most applications, a weld bead should have a smooth, consistent height as an indicator of a stable weld process.
 An image of a weld bead with bead ripple
In some applications, a weld bead ripple can be desired, such as in certain coated steel products. This ensures that all contaminants from the area of the weld have been squeezed out, preventing potential inclusions from occurring in the weld bead, which would result in compromised weld quality.
By measuring the bead height on a weld bead over a period of time using a laser based triangulation system , an indication of the smoothness of the weld bead can be made. By calculating ongoing historical statistics of the head height (e.g. min/max, average, standard deviation), an indication of smoothness of the weld bead or bead ripple can be made. Tolerances of the amount of smoothness or ripple can be set to match the process and when exceeded, an alarm can be set.
 Measuring the weld bead height over successive images can detect bead ripple over time
Want to learn more about detecting critical defects in welded tube? Check out our article Detecting Welded Tube Defects with Xiris: Critical Defects. We cover various profile defects like Scarf Depth, Scarf Width, Mismatch, and Deflection.


.png)
