Legislative requirements forcing automotive manufacturers to improve their fleet’s fuel economy has put pressure on reducing the overall weight of a vehicle and a number of the components involved. Over the past couple of decades, tubes and formed profiles have made their way into automotive designs as cost effective substitutes for a variety of components in an automobile. One way to meet the demand for greater weight reduction is to use thinner materials with higher strength welds. This has been implemented in a variety of tube applications where more customers are designing thin walled applications that demand more precise manufacturing techniques to meet their expected quality standards. A typical example is in the exhaust tube assembly which includes the catalytic converter segment, exhaust piping segment, and decorative portion. Designers of exhaust systems are under greater pressure to reduce weight so they constantly turn to thinner walled tubing to meet their needs.
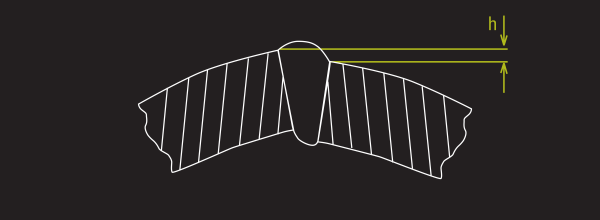
Detecting weld defects on welded tubing is important on most tube and pipe mills. However, the thinner the wall thickness, the more critical it is to inspect the weld as soon as possible after welding. Thin walled tubes are typically made of low carbon steel, which is most effectively welded with TIG or Laser welding processes. Of all the defects that can occur when making a thin walled tube, mismatch (the uneven alignment of the two sides of material as they come together) is the most critical. Any small amount of mismatch becomes significant relative to the wall thickness, and a critical problem where additional forming is performed on the tube. Forming technologies such as hydroforming or roll forming require a precise fit up of the material to produce a smooth formed tube for the process to be effective.
 Mismatch
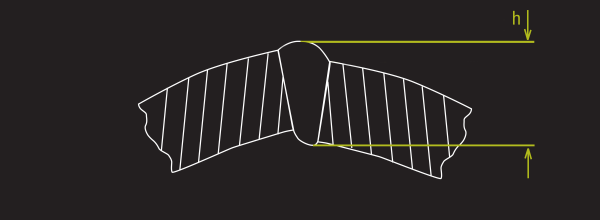
In addition, any sunken or concave welds may also cause problems similar to mismatch, by increasing the through-wall thickness of the tube so that the overall thickness of the weld bead area becomes substantially larger than the parent material, potentially causing interference fits when two thin walled tubes are sleeved together.
 Through Wall Thickness
To detect these defects, and other important defects during the welding and forming processes on a tube mill, progressive fabricators turn to the WI2000p Weld Inspection System. Using a precise laser camera technology, the WI2000p can detect mismatch, weld height, and other welding and forming defects as small as 7 µm. By placing the WI2000p system after the weld box, fabricators can detect very small changes in forming characteristics that could cause failures in the field.
For more information on tube inspection, and many useful videos, please visit our new Tube and Pipe Library on our website


.png)
