The final blog in our series Detecting Welded Tube Defects with Xiris will discuss the measurements directly related to the weld bead: Bead Height (Raised or Sunken Weld), Bead Width, Bead Roll and Bead Ratio.
If you’ve missed it, over the past few months we have discussed the many measurements that the Xiris WI-2200/3000 Weld Inspection System can calculate to monitor and detect defects on welded tube and pipe.
| Various Profile Defects: | |
| 1. Scarf Width 2. Scarf Depth 3. Scarf Defect 4. Deflection 5. Mismatch 6. Freeze Line |
7. Undercut 8. Left/Right Slope Angle 9. Bead Height 10. Bead Width 11. Bead Roll 12. Bead Ratio |
Bead Height (Raised or Sunken Weld):
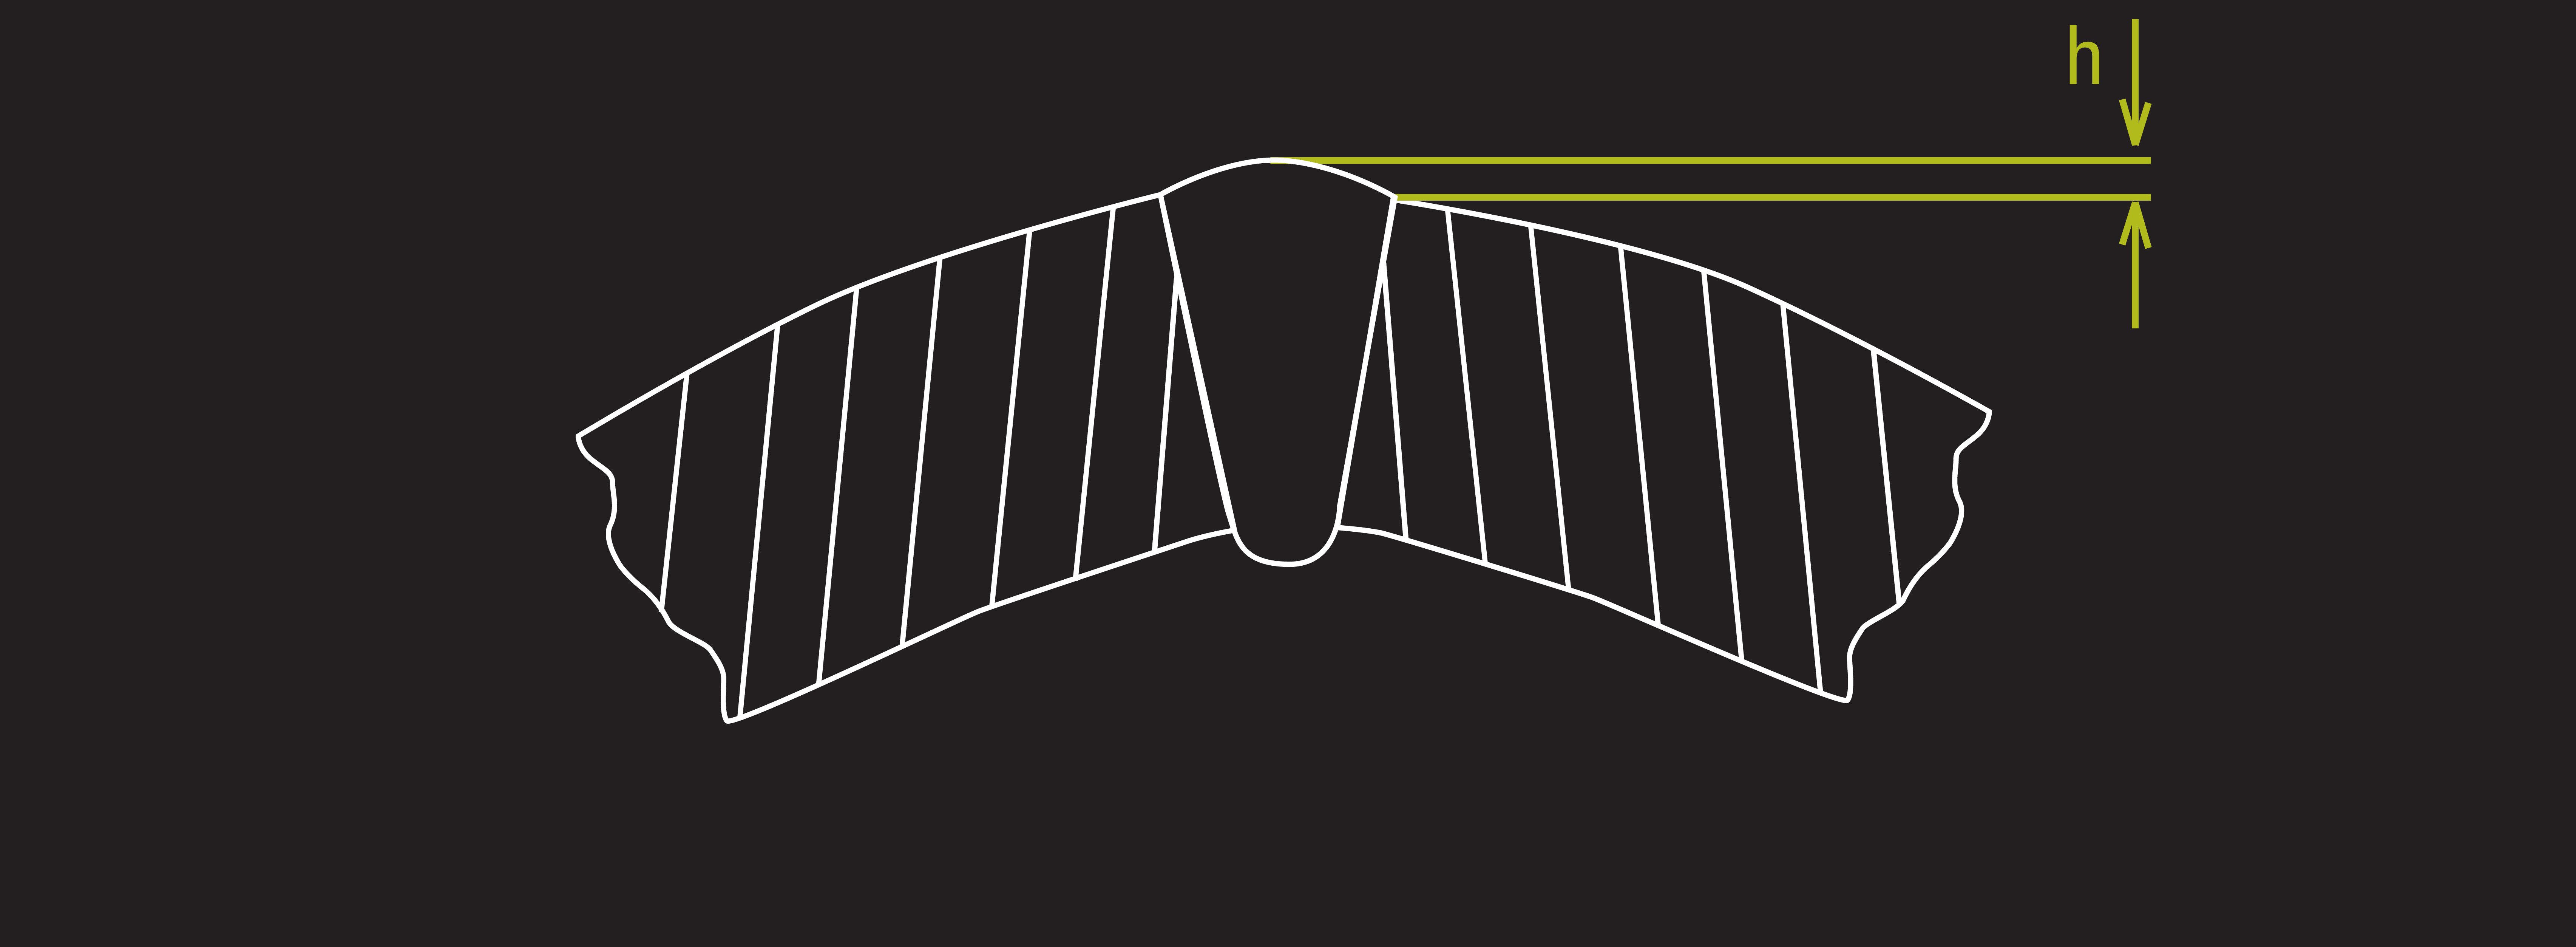
The material in the bead area may rise above the tube surface or drop below it and depending on where the weld bead surface is found, is called either a Raised Weld or Sunken Weld. A Raised or Sunken Weld can occur depending on the compression force and the welding process, the temperature of the weld bead and various metallurgical issues. While the Raised Weld may not be considered as important a defect to the fabricator (as it can be scarfed or ground off later), the Sunken Weld typically caused by insufficient squeeze pressure or too hot of a weld could be a weak point of the tube along the bead and be a potential site for failure.

Bead Width:
The Bead Width is a linear measurement across the profile of the bead, measured from the inflection point between the parent material and the edge of the bead on either side of the bead. The Bead Width is affected by several parameters such as the thickness of the material being welded, weld temperature, squeeze pressure, metallurgy, shielding gas and a variety of other parameters. Variations in the readings of Bead Width indicate welding and/or process inconsistencies.

Bead Roll:
The Bead Roll is the distance in degrees of the angle subtended by the center line of the bead and the assumed vertical axis of the tube. It is measured so that roll is considered positive when the center of the bead is to the right of the center of the fit circle. Bead Roll is often observed to be an indication of uneven stresses in the tube feedstock material as it is formed. The resulting twisting of the tube could potentially cause the tube to rotate enough so that the weld bead does not get scarfed correctly.

Bead Ratio:
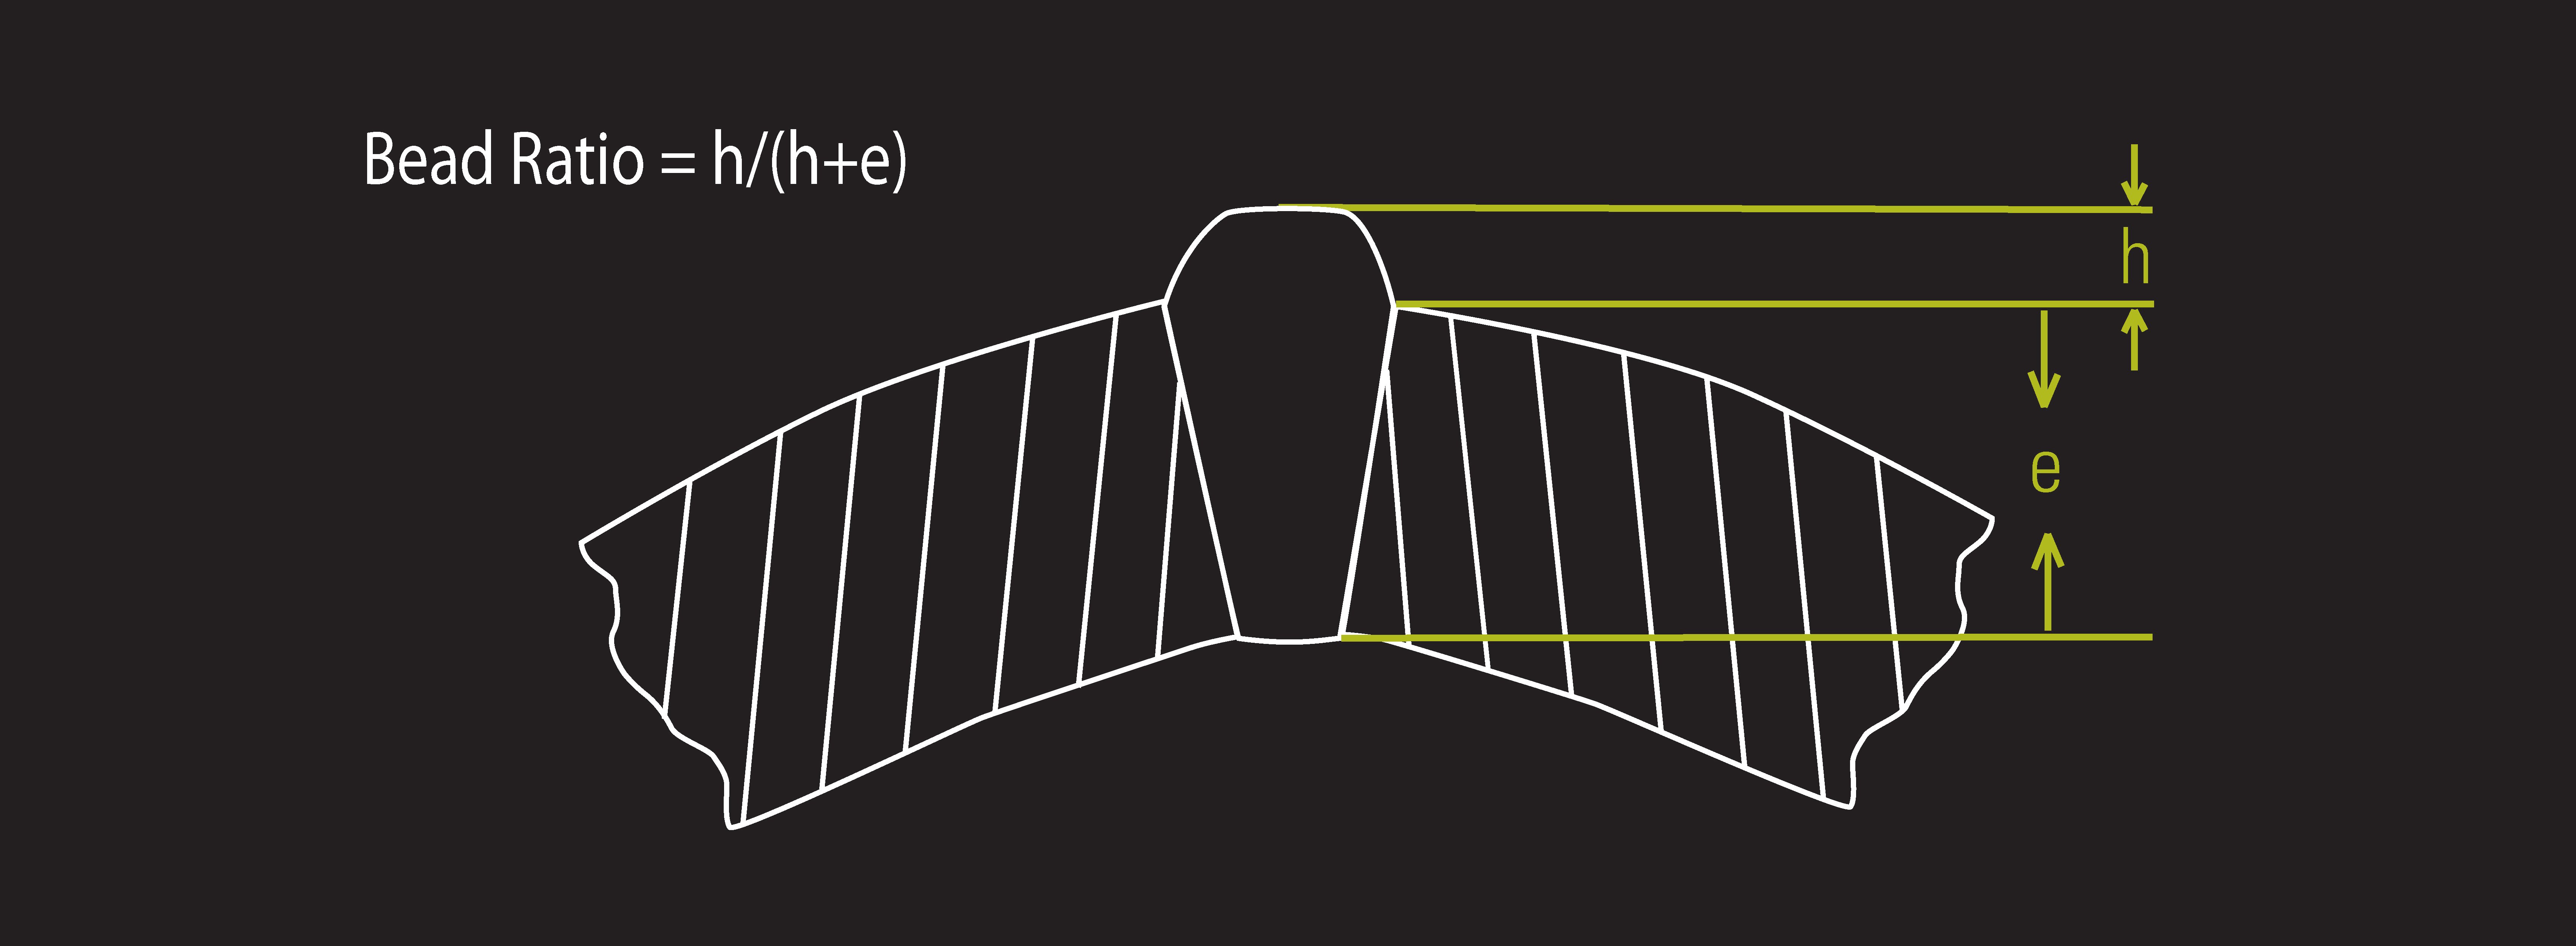
The Bead Ratio is calculated by measuring the maximum bead height above the parent material, divided by the thickness of the parent material wall thickness. The great advantage of the Bead Ratio is that it is unitless, therefore a bead ratio for a thick wall tube can be compared to that of a thin wall tube. The Bead Ratio is an important measurement for ERW/HF processes to monitor the overall weld bead height relative to the thickness of the material. It is an excellent indication of the squeeze pressure used on an ERW/HF mill.

When a defect warning or failure limit is breached, an audio and/or light tower signal can be sent. The condition can also be sent to a defect marking system (paint or laser) that marks the area of the product where the error occurred for further inspection, repair, or removal.
Adding a Xiris WI system to your mill provides real-time monitoring for multiple defect conditions, enabling continuous incremental improvements of mill quality and productivity.
Be sure to check out all the previous blogs in the series to learn more about all the measurement metrics the WI-2200/3000 Weld Inspection System can capture for monitoring and detection of defects on welded tube and pipe.
Stay up to date by following us on social media or subscribe to our blog!


.png)
